Thursday, February 24, 2011

On Creme Brulee and Breakfast Whimsy

Before I start, could I insert a touch of randomness here? The good folks over at CSN have reached out to me about hosting another giveaway! They have basically everything you could possibly imagine, everything from pretty blue dutch ovens to outdoor playsets, so this should be exciting. But you know what they don't have? Sadly they don't carry these adorable egg molds. I got two of them forever ago and due to the chaos that is my kitchen I only found them this weekend. The occasion called for soft boiled eggs for breakfast:

Fishy Fishy Breakfast

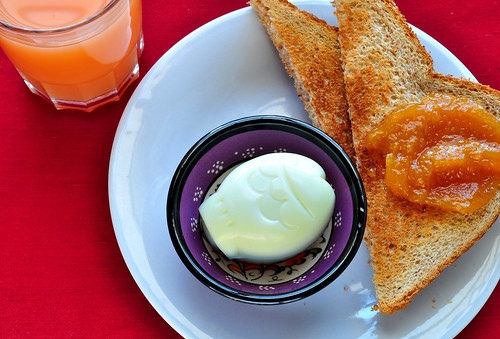
Yep, that's an egg shaped like a fish. Isn't that the cutest thing ever? Totally useless though, not like that certain something special the winner would be able to get with their gift card....but onto the topic at hand!

There are so many things I haven't tried to make because I was afraid of failure, but no more! I have been afraid of Creme Brulee for far too long, so for Valentine's day I invited some friends and put it on the menu. After a brief, and completely irrational, moment of panic about trying something completely new with a whole dinner on the line, I set about finding that perfect recipe with the most fool-proof instructions and with the 115% swoon guarantee. And you know what I learned? Aside from infusing the cream to change the flavors to almost anything from basil to raspberry to matcha, the base recipe stayed basically the same. There were a few ratio differences, of course, but the the core elements were the same, and there were so few of them! Simplicity itself, right? So I used them all. I took notes, I wrote down inspirations, and I came up with this recipe...which I've now made 4 times. I've never gone through this much heavy cream before. And since they say that color means flavor, I just had to incorporate a bit of it in here as well.

Please excuse the crappy picture, I literally took this on my way out the door before work, and if you know me at all, you'll know that I was running late.
Creme Brulee

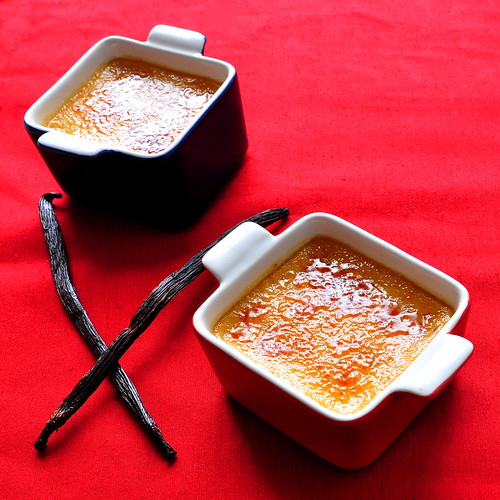
Creme Brulee with Color
I pulled ideas from so many places that I can't really give credit to any one, so I'm going to say this one is mine, with the world wide web as inspiration.

1/2 cup vanilla sugar*
6 egg yolks
2 Tbsp molasses (regular, not dark)
1 vanilla bean, or 1 Tbsp of Nielsen-Massey Pure Vanilla Bean Paste, which is awesome
pinch of salt
2 cups heavy cream
extra vanilla sugar for topping

* You can totally use plain sugar here, but I keep a jar of sugar into which I toss in my used up vanilla bean pods and I finally found a use for it!

- Preheat the oven to 350F and place 6 ramekins into a deep baking pan.
- Bring a teapot full of water to boil and keep on the side.
- Whisk first 5 ingredients (not the cream) in a bowl and set aside. If you're using a vanilla bean, scrape out the insides into the mix, let the outside dry out and then start a jar of vanilla sugar for next time :D
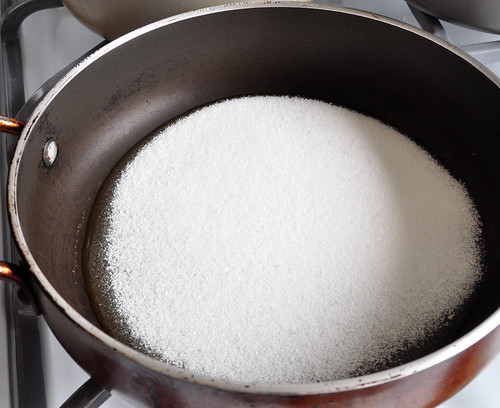
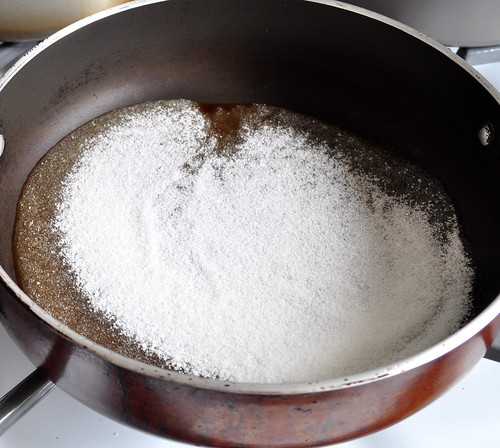
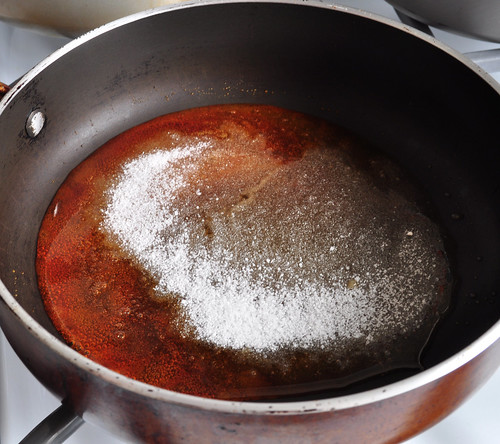
- Bring the cream to simmer in a slow pot and whisking the entire time slowly temper it into the sugar/yolk mixture by adding it a little at a time.
- Once all the cream has been tempered in, pour the mixture into the ramekins. Then pour the boiling water into the pan reaching halfway up the ramekin sides, being careful to keep the water out of the cream.
- Carefully slide the pan into the oven and set the timer to 30 min. You want a the custard to set a bit, but still be jiggly.
- Carefully slide the pan out of the oven and allow everything to cool before you remove the ramekins. Let them come to room temp, then cover with saran wrap and chill in the fridge for at least an hour.
- When ready to eat, sprinkle sugar in a thin and even layer on top and go to town with your torch, or slide them under the broiler for a few seconds.
- Don't forget to share!

Wednesday, February 9, 2011

Caramelized Pecans and a Simple Salad

Ignoring my craft closet, which is quietly busting at the seams, I've decided to pick up two more hobbies. I can't help myself, textiles and design and all things pretty call to me and I want to try making them all. So now I can tack on quilting and letterpress to my "I know a bit about how to do that" list. I bribed a sewing genius of a friend with food to help me with my color circle quilt and it's really starting to take shape, which is making me super excited. Once it looks a bit more like an actual quilt, I'll share pictures with you guys, I promise. And as a belated holiday gift to myself I signed up for letterpress classes at a local studio. It's still too early to tell if I'm any good at that, but you can be sure that next year's holiday caramels will come in pretty hand stamped packages.

As you can imagine, all of this leaves me with very little time for cooking and one thing I've been making a lot of around here is salad. I like making salad, layering the ingredients, balancing the toppings to make it look pretty, but I don't actually like eating it. I don't know, it just seems like so much chewing for not so much flavor or satisfaction. It's good for you though, so in an effort to be healthier I've been trying to come up with ways to make salads more exciting.

The first thing I did was to buy a small bottle of the very best, the uber yummy, thick and syrupy balsamic vinegar. There were days when I used to smother everything in ranch, but ever since I moved past the cheap grocery store balsamic, I haven't looked back. My current obsession is with the aged blackberry and ginger balsamic I bought at the French market a month ago. It's so good, I don't even temper it with olive oil. And on standby I have 18 year aged balsamic from Old Town Oil, which is also fantastic.

Simple Salad w Fork

I top a bowl of mixed greens with crumbled goat cheese, sometimes little chunks of marinated beets, sometimes dried cranberries, but always with candied pecans. I don't know why, but even a few of these babies never fail to make me actually want to eat the big pile of greens underneath. And there's no reason to spend $10 for a tiny bag of candied pecans either when all it really takes is some sugar and some raw or lightly toasted pecans to make them yourself.

Just set aside a silpat or lightly greased cookie sheet, dump a half a cup of sugar into a pan and set aside a cup of pecans. You can toast your pecans or leave them raw, I've done it both ways and it really comes down to how lazy I'm being at the moment, it's delicious either way.

Try to keep the sugar in the pan in a nice thin and even layer, then crank up the heat and don't go anywhere! I keep the heat on high, but you may want to turn it down a little bit your first few times. It will take the sugar a little while to get going, but once it starts things go pretty fast and burned sugar smells horrible.

Sugar 1

It will take a while, but eventually the sugar will start looking like wet sand and then slowly will start to melt around the edges. DO NOT STIR IT! Don't swirl the pan, don't even touch the spoon and for goodness sakes don't go anywhere.

Sugar 2

As the sugar starts to melt more you're going to see a bit of color development around the edges and there will still be some un-melted sugar in the middle, but at this point you're still okay, so just stick around and watch.

Sugar 3

Once you get here, if you're really starting to get nervous, you can carefully nudge the hot sugar towards the un-melted pile, but don't stir or you'll end up with clumps. If you do get clumps, turn the heat down a bit and keep stirring until everything is even. Just be sure that you don't let the color get too dark. As soon as you reach a nice deep amber color like I have here, take the pan off the heat.

This, by the way, is also the first step to making caramel. If you were doing this in a deeper pot, you could CAREFULLY add cream a little at a time, stirring like mad, and you'll end up with yummy caramel topping. You could also add boiling water, also carefully and also a little at a time and also stirring like crazy, to make a caramel flavored simple syrup...which I'd imagine would make for some fantastic cocktails. Or you could keep going and stick with the salad plan. Up to you.

Sugar 4

Working very quickly, stir in your pecans and spread everything out on your Silpat or greased sheet. The cooked sugar will set quickly so the faster you get this done, the easier and less messy things will go. Do not touch the sugar! It's basically boiling lava and it will hurt like nothing else, so don't touch anything until it's completely cooled.

Caramelized Pecans

Once the sugar has cooled completely you can break apart the pieces and top your salad...or just eat them straight, but that would defeat the salad point.

Simple Salad

P.S. My friend asked me to tell everyone that if something should go wrong during the caramelizing process and you burn the sugar, do not pour the hot bubbly mess down the drain. The sugar will seize and clog the drain. Then you will panic and break your favorite fork trying to chip away the clog, and then fill the sink with boiling water and hope that everything melts before your boyfriend shows up and laughs at you. The best thing to do is to just let the mess cool a bit in the pan and then soak the pan in hot water. It will come right out and then you can try again.

Tuesday, February 1, 2011

Every Day Quinoa

I wish I could give you some amazing story about what I've been up to this past month that has kept me away from this blog; some grand adventure that taught me the ultimate recipe to living. The truth, however, is much more Anna-esque: I lost the USB cord to my camera and haven't been uploading pics. ***cricket noises*** I know, I know, I'm ashamed. Especially since it ended up being neatly rolled up in my organized box of cords. See? New Years resolutions of being more organized have upset my sense of order in chaos.

Despite the lack of online presence, I have been quite busy these past few weeks. There were cakes and cookies and spreads made, and now that the pictures are on my computer I'll tell you about all of them, but the very first thing I want to share is the dish I make whenever I'm at home in the afternoon. Whenever my fridge declares that if all I put in is celery then what the heck can I expect to pull out, but celery? P.S. I am not a fan of celery and yet the sucker keeps finding it's way into my home. As long as I can convince an avocado to join me for a meal, this dish gets made. It's extremely fast, it's super easy, it's all made in one pot, and I daresay it's even sort of healthy. Sort of.

Can I tell you something? Don't laugh at me, okay? Ever since I learned this technique for cutting up avocados, every time I do it I feel like a genius. I know that probably everyone in the universe already knows how to do this, but it never fails to make me feel like I invented the technique. I'm even willing to share:

1. Cut an avocado in half around the pit and twist the two halves to separate.
2. Holding the avocado in one hand (keeping your fingers, palm, etc. as out of the way as possible unless you really like that cute nurse in ER and would like stitches) whack the knife into the pit and twist it out. This part will make you feel like a ninja. Feel free to make "hiyaaaa" noises, I won't tell.
3. Take the knife and slice the avocado flesh while it's still in the shell and then just scoop out perfectly cut cubes with a spoon. No mess, no chasing slimy avocado across the cutting board (or washing said cutting board), nothing but perfect little cubes:

Cut Up Avocado

Ta daaaa!

Okay, sorry. I told you I get very excited about cutting up avocados. Lets agree that I'm a dork and move on with the recipe.

I found this recipe over at Tea & Cookies almost a year ago, and I remember immediately going to the store and getting a box of quinoa and a bottle of Ponzu sauce, neither of which have ever stepped foot in my kitchen before that. The recipe comes from China Forbes, lead singer of Pink Martini, whom I've discovered long ago and whose "Dosvedanya Mio Bombino" and "Hang on Little Tomato" have been in heavy rotation on my iPod for years. The recipe itself is warm and comforting, smooth and salty, a little bit sushi-esque, and altogether delicious. Try it, you'll like it.

Yummy Quinoa

China Forbes Quinoa with Avocado
via Tea & Cookies

1/2 cup uncooked quinoa (red, black or yellow will work great)
1/2 slightly firm avocado, or more as desired
2 tbs Ponzu (Japanese soy/citrus sauce)
1 tsp sesame oil
Squirt of Siracha chili sauce to taste
Handful of nori strips (or just cut a regular sheet with scissors)

Cook the quinoa in 1 cup water according to package instruction. Basically bring to a boil and simmer for about 20 minutes until the water is absorbed. Yellow quinoa will get soft, black quinoa stays a bit firm and seedy.

Drizzle in the ponzu, sesame oil, and chili sauce right into the pot, stir in and dump into one or two pretty bowls (depending on how hungry or willing to share you are). Cut the avocado in chunks and dump on top. Sprinkle with nori strips. Stir, eat, and swoon.