Wednesday, December 5, 2012

Chocolate Walnut Cake

You'd think that after spending several days doing nothing but playing with props, all the pictures featured in my blog going forward would be gorgeous, carefully styled and feature pretty spoons and napkins and stuff. Well, you'd be WRONG! See, while I've learned a lot and will definitely be doing my damnedest to try and incorporate all of those things, sometimes I have exactly 3 minutes to take pictures before the cake goes into a box and is rushed out the back door. Those 3 minutes don't exactly leave very much room for tweaking and styling. But I'm going to try, otherwise it would have been all for nothing.

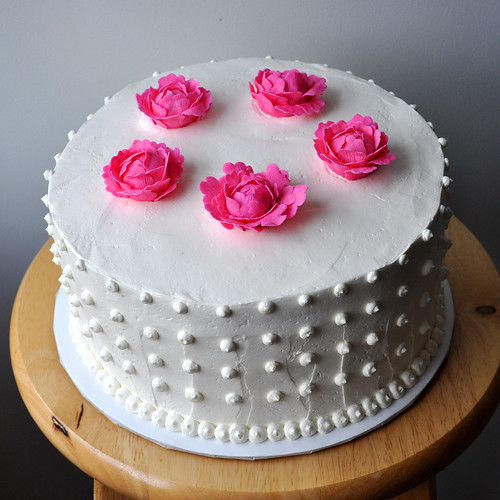
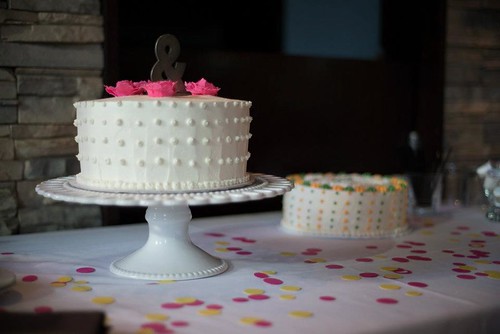
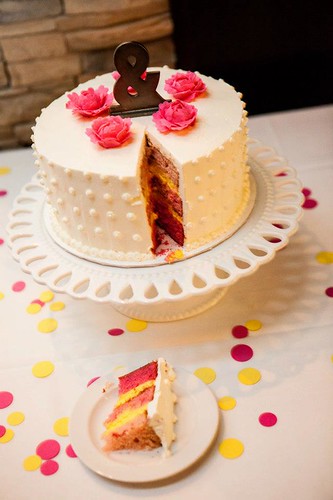
For example this cake, which I've now made twice in the past two weeks (with the 2nd being an improvement on the first). Both times it was for someone else and both times I've had no time to take pictures, but I wanted to tell you about it, so I plopped it really quickly in front of my white fridge on a cake stand I haven't had time to put away yet and there you go.

Chocolate Walnut Cake

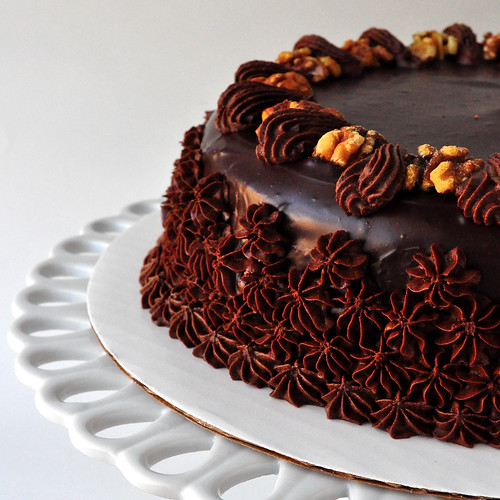
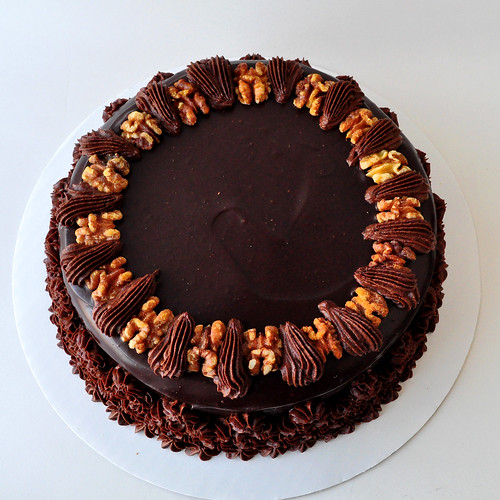
The cake itself contains two layers of a dense moist walnut cake with a layer of chunky walnut ganache and a layer of amaretto spiked chocolate mousse sandwiched in between. A smooth coat of ganache went on top and the sides got treated to rows of stars made of leftover chocolate mousse. A few toasted walnuts on top and Voila! Cake.

Chocolate Walnut Cake Top

Chocolate Walnut Cake

Double batch of Walnut Cake from here baked in two 9" round tins

Chocolate Mousse:
6 oz semi-sweet chocolate, roughly chopped
2 Tbsp instant espresso or coffee
1 Tbsp Amaretto
3 egg whites (absolutely NO yolk), room temp
2 Tbsp sugar
1 cup cold heavy cream

Chocolate Ganache/Walnut filling:
1 cup heavy cream
2 Tbsp unsalted butter
15oz semi-sweet chocolate
1/2 cup toasted walnuts, roughly chopped

Optional:
As many pretty toasted walnut halves as you can find and not eat

1. Make a double batch of the Walnut cake and allow the layers to cool completely while you make the mousse, filling, and icing.

Mousse:
2. Combine the chocolate, espresso and amaretto in a microwave proof bowl and melt the chocolate by heating at 20 second intervals, mixing with a spatula after each interval until the chocolate is smooth. Set aside to cool.
3. Beat the egg whites in a mixer with the whisk attachment (or a hand beater) until soft peaks form. Slowly add the sugar and continue beating until stiff and glossy. Do not over-beat, you want to stop as soon as you get to the shiny stiff peak consistency.
4. Beat the whipped cream on high until peaks form, about a minute. Don't over-beat or you'll have butter (not a bad thing, but not what we're going for here).
5. Fold 1/4 of the heavy cream into the chocolate mixture and gently fold it in with a spatula until thoroughly combined. Add the whipped egg whites and gently fold in until combined. Add the rest of whipped cream and once again, fold in gently until thoroughly combined.
6. CHILL the mousse in the fridge for AT LEAST an hour before using. If you don't, it won't support the top cake layer and everything will ooze out creating a mess and you'll hate me for ever sharing this recipe.

Ganache/Filling:
7. Combine the heavy cream and butter in a small saucepan set over medium heat and heat it until the very first bubbles start forming along the edges. You don't want this to boil or even simmer.
8. Dump the chopped chocolate into a heatproof bowl and pour the hot cream over it. Gently whisk until completely combined and smooth and pretty.
9. Remove 2/3 cup of the ganache and combine with the chopped and toasted walnuts in a separate bowl. Allow both to cool to room temp.

Assembly:
10. Lay one cake layer on your cake plate/cardboard circle and spread the walnut ganache evenly over the bottom. Chill in the fridge for a few minutes if the ganache is still soft.
11. Spread a thick layer of the mousse over the ganache. Save some to use as garnish. Again, chill for a few minutes if you feel the mousse is still somewhat soft.
12. Top with the second cake layer and smooth down the sides if any of the ganache/mousse is peeking out.
13. Make sure your ganache is cooled to a still soft, but not runny consistency and pour it over the top of the cake, smoothing down the sides with an offset spatula.
14. Scoop the remaining mousse into a pastry bag fitted with a star tip and pipe a ring around the base of the cake to cover up any mess the poured ganache may have made.
15. Chill any left over ganache, scoop into a pastry bag fitted with a star tip and alternate walnut halves with chocolate swirls around the top of the cake.
16. Chill the cake until ready to serve (use this time to wash the mountain of dishes) and remember to it out 30 minutes before cutting.

Monday, December 3, 2012

Food Photography Workshop with Helene of Tartlette

This all started almost a year ago. It wasn't very long after new year's and I was feeling landlocked, frustrated, and in desperate need of a vacation when Helene of Tartlette posted about the different workshops she was planning over the next year. I love her work and think her photography is gorgeous (and goodness knows I need help in that department), but it would definitely be a major splurge so I waffled back and forth and pestered my friend Joy on whether I should do it and in the end I just clicked the button and signed up. I had to dip into my savings, but this was a rare opportunity and boy would it be worth it! Over the next months whenever I'd get upset or frustrated or get that feeling to hop into the car and just take off, I'd remember about this trip and feel better. That feeling of an adventure already planned and booked is one of the best feelings, I think.

32 NomNomNom

So that brings us up to the first week of November, when after a long wait I finally packed my bags and boarded the plane. I arrived a few hours before Helene's husband Bill was supposed to pick us up, so I grabbed lunch at the airport and wandered around the shops before finally settling down to wait and read my book, but the girl I'd settled next to noticed my tripod sticking out of my backpack and asked if I was there for the photo workshop. Krisztina Desi had been traveling across the US for a few weeks and was going back to Budapest right after this workshop, so my trip had started with me speaking Russian (mom would be proud). Pretty soon Libby Stephens joined us and man alive, she was an absolute riot! A few minutes after that, after scaring away a woman who was definitely not part of our group, we had flagged down Melissa Cole and after we were joined by Karen Cornett and Claire Perez we all squeezed into Bill's red van and headed for the beach house. 


2 Berry Tart

At the beautiful beach front summer house just outside of Charleston, SC we were met by our two teachers for the weekend, Helene Dujardin and Claire Barboza, as well as our wonderful chef for the duration of our stay, Laura Vein. They couldn't have been nicer or more gracious. I had won the room lottery and got a cozy room right by the front door all to myself and while we waited for people to arrive, I settled in, opened all the windows, and let as much of the ocean air in as possible.

5 Macaroons

Slowly the rest of the workshop attendees started filtering in. Alysha Yoder, an incredible photographer who I wound up pestering to no end later that weekend to suck up as much Lightroom knowledge as possible.  Stacy Able, a fabulous wedding and doggie photographer who is in Panama right now volunteering for the Seeds of Help foundation (and has promised to send me some Guatemalan coffee once she comes back!). Tiffany Scales, of the lovely Savor Home blog. Amy Schleider, who drove in all the way from Missouri and was kind enough to drive and hang out in Charleston with Alecia and I on the last day of the trip. And lastly, as the girls began to open up the wine bottles lined up on the counter, Bill brought Dina Sandakli, a lovely girl whose travel exploits are truly enviable (and who tried to teach us belly dancing as well as the non-PC difference between Indians and American Indians according to her college history professor). Once everyone settled in we had dinner, discussed the schedule for the weekend, enjoyed a fabulous ice cream buffet (homemade ice cream of course), and talked and talked. Once people began disappearing to their rooms, I took a walk on the beach. The water was just warm enough to roll up my pants and get my feet wet, and without the glow of a city nearby, the moon and the stars were the only things reflecting off the water. Just what I needed.

16 Props

The next few days were filled with beautiful food, running around the house to claim a spot with the perfect lighting, sorting through a huge table laden with props(!), finding corners around the living room to plug in and edit photos, learning various techniques and strategies, chatting, eating fabulous food and drinking wine. On Saturday morning we all got up extra early and drove to the Charleston Farmer's market to take photos (and buy a few things...because I can't NOT buy anything at a farmer's market).

AG - Market

21 Eggplants

I chatted up this lovely pickle lady and who let me take some photos of her and gave me a small container of pickled peanuts. I also grabbed a small container of her pickled beets, which were amazing.

23 Pickled Beet Lady

Back at the house we had to earn our lunch. Helene fried or poached fresh goose eggs, Laura fried up some bacon and we once again dashed to the props table to assemble and photograph our meal before we could dig in.

26 Duck Egg Breakfast 2

On Saturday evening we piled into three cars and drove once again into the city to the gorgeous Lana Restaurant. Chef John Ondo, a friend of Helene's, was kind enough to allow a dozen women to run around his restaurant and pester his staff with our cameras. They didn't even mind it (too much) when we took turns popping into the kitchen to get some behind the scenes shots. Every once in a while we'd head back to the table and enjoy the incredible dishes. I had the phenomenal poached pear and gorgonzola salad, a delicious Basque style chicken, and a lovely lemon and olive oil cake (Helen's mother's recipe).

36 Oh the pans

AG - Hands off the Spoon

38 Glasses

49 Chef Plating the Fish

50 Team Effort

53 Lemon Olive Oil Cakes

The next day we got back to work and I began cataloging in my head the list of props I absolutely must acquire for myself. That gorgeous linen runner and those adorable numbered cups and dishes are at the top of that list.

56 Lunch

Towards the end of the trip, during some free time, a few girls and I took a walk from the beach house to the pier to check out the handful of shops there and I'd discovered that the Ben and Jerry's there still had my all time favorite ice cream flavor, which had been retired everywhere else: Coffee Coffee Buzz Buzz Buzz. Well, you know I had to have some, right?

DSC_1341

Also, on Sunday night, just after it started getting dark, they sky opened up and it began to rain. A few minutes after, the power went out as far as we could see, and there were lightning bolts in the sky, one right after the other. I grabbed my camera and tripod and ran up to the 2nd floor balcony to shoot. I got some decent pictures and it was wonderful to not be the only girl running towards the storm instead of away from it; Alecia and Libby were right there next to me trying to keep our cameras dry and having a total blast.

Across the Street

The power eventually did come back on, and the trip eventually had to end, but I learned a lot, made some friends, and truly relaxed. I don't have a recipe for you today, but I'll be back shortly with a few things I'd been up to, I promise.

Friday, November 2, 2012

Black Forest Dessert Sauce

Hi! How are ya? What's new? Good! Me? Well, let me tell you! I know it's been a month since I've promised to tell you about all the cakes, cakes and more cakes that have been flying out of my kitchen, but there have been so much happening since then that I barely know how I'll ever get you all caught up, so instead I'm going to just share everything and tomorrow we'll start fresh. Okay? Great.

A few weeks ago, I made sugar paste from scratch and created several of these:

Peony

And I put them on top of this:

Mollys Wedding Cake

A topper went on top of that (go figure) and turned it into this (picture pilfered compliments of South Branch Tavern and Grille):

32384_402570026482195_1091440283_n

It was a vanilla cake with lemon curd filling and italian meringue buttercream on the outside. Here's another pilfered picture of the insides:

222421_623592069991_33978459_n

And that one in the background up above? That was the groom's cake. A key lime pie cake to be exact, though there are no pictures of the insides. Guess the guy is a U of Miami fan?

Grooms Cake Top

Then there was this (ignore the bad lighting, it's what happens when you bake in the middle of the night), a rich chocolate cake filled with chocolate fudge and fresh blackberries:

Chocolate Blackberry Cake

There was also an ENORMOUS cake covered in pink roses, but there are no pictures of that because it was finished and delivered at 2am, in the dead of night, under the cover of rain. Not kidding. I pulled the keys out of the mailbox, backed the car into the driveway, loaded the monster into the trunk, drove it two blocks to the clubhouse where the party was going to be and drove back as my drunk neighbors were coming back from a night of bar hopping.

There were cookies made, jam, gluten free scones (man do I need to keep working on those, they were NOT good), tarts and tartlettes and baked goods galore. There was a brunch with friends and lots and lots of wine. There was stress at work, lots of hours in front of the computer and many cups of tea. Oh yeah, and my tea kettle broke. Before you ask, it was an electric one and yes, the next one will be the old fashioned kind that doesn't require an outlet and never fails. And none of that even includes the half a dozen sewing projects I'd finished, including these two pillows (complete with zippers!):

Pillows

There was also a LOT of greek yogurt. You see, I'm slowly working through my rather extensive stash of jams, jellies, sauces, and preserves of all kinds. I haven't even told you about HALF of my canning expeditions this summer (though I promise I will). And last week I have finally scraped clean the very last of the Black Forest dessert sauce that I made last summer. Since I've been eating it on top of yogurt, it's technically breakfast food. Plus there are cherries.

Black Forest Sauce

I had found a recipe for cherry sauce somewhere along the way and had heard of people adding cocoa to their canning projects, plus there's a bottle of kirschwasser hanging around in my liquor cabinet, and I had bought a giant box of dark black cherries for next to nothing from the back of a truck...ahem...so somehow all of these needed to come together. (And yes, I made another animated gif. I might be having too much fun with these).


And before I give you the recipe I have to tell you that right now I'm having a bit of a surreal moment. I've just come back from a walk on the beach where the ocean water is still warm enough to roll up your pants and walk barefoot along the surf. The moon is big and yellow and the sky is full of stars. I'm sitting on a sofa in a gorgeous beach house in Charleston, South Carolina and across from me is another late owl, Helene Dujardin, of the incredible blog Tartlette. I'll tell you about how THAT happened in a few days when this is all over, but in the mean time I'd just like to wish you all a happy fun filled weekend, because that's exactly what I intend to do myself.

Black Forest Dessert Sauce
Adapted from so many sources that I may as well call it my own.

3lbs dark black cherries, pitted
3 cups of sugar
1 cup cocoa
1 cup water
1/4 cup Kirschwasser

1. Combine everything except for the booze in a large pot over high heat and bring to a boil. Cook, stirring often for about 20 minutes.
2. Blend everything either with an immersion blender*, add the Kirsch and cook for another 5 minutes. 
3. Ladle into clean/sterilized jars and either boil in a water bath for 10 minutes if you want to keep it for a few months, or let it cool and keep in the fridge if you plan on eating it within a week or two. 
4. Pour over ice cream or yogurt and enjoy.

* I LOVE my immersion blender and highly recommend you get one, but if you don't want/have one I'd recommend blending the cherries before you cook them because blending hot sugar stuff is really scary. 

Thursday, October 18, 2012

Roasted Eggplant with Goat Cheese

People have been passing germs around the office for the last month and despite taking vitamins and drinking more orange juice then I can ever remember, I finally succumbed to the cold this past weekend and have been miserable ever since. The worst part is that all I want to do is sleep, but as soon as I lie down, I start to cough. So instead of resting I've been jamming, working on forgotten sewing projects, cleaning and drinking tea by the gallon. I guess I'm not capable of curing up on the couch in front of the TV for very long.

Spiced Eggplant Raw

Also, because if this cold I have also had almost no appetite and absolutely no desire to go grocery shopping, so dinners have consisted of odds and ends around my pantry and fridge. That's not nearly as sad as it sounds though because according to my sister, a person can live for a month on what's in my kitchen when I say I have no food.

Spiced Eggplant Baked

I'd pinned this recipe from The Kitchn a while back and finding one lonely eggplant in my fridge and a tiny wedge of leftover goat cheese, I mixed what I had and waited while the oven did it's job. Since I'd halved the recipe, but kept all the spices and garlic at their original amounts, the flavors were stronger, but I loved it. It was warm and comforting and made for a quick and simple meal served over steamed rice. Just goes to show that you don't absolutely have to follow a recipe to the letter to end up with a delicious dinner (and I'm hoping the extra garlic helps me kick this stupid cold...I'm not good at being sick!). And tomorrow, I think I'll make soup out of the giant butternut squash my coworker gave me from her garden. Who knows? It might be another week before I have to go grocery shopping again.

Spiced Eggplant

Roasted Eggplant with Goat Cheese for Two
Adapted heavily from The Kitchn, partially because I don't like cilantro and mostly because I didn't have smoked almonds.

1 large eggplants
Kosher salt
2 Tbsp olive oil
1 Tbsp cider vinegar
1 Tbsp honey
1 tsp smoked paprika
1/2 tsp cumin
4 large garlic cloves, roughly chopped
Juice of 1 lemon, about 2 tablespoons
1 Tbsp soy sauce
1 ounce goat cheese, crumbled and divided
Steamed rice (optional)

1. Heat the oven to 400°F. Cube the eggplant into 1-inch pieces and put in a large bowl. Sprinkle lightly with kosher salt and set aside while making the marinade.
2. Whisk together the olive oil, cider vinegar, honey, smoked paprika, and cumin. Dab away any extra water that has beaded up on the eggplant and toss with the marinade. Stir in the garlic. Spread the eggplant on a large baking sheet, lined with parchment and slide onto a rack placed in the center of the oven. Roast at 400°F for 40 minutes, or until very tender and slightly browned. Stir it halfway through to make sure it browns evenly. Remove from the oven and cool slightly.
3. Whisk together the lemon juice, soy sauce and most of the goat cheese (reserve a little to garnish). Return the eggplant to the bowl and toss with the lemon juice mixture.
4. Serve on it's own or over steamed rice. Go back for seconds.

Tuesday, October 2, 2012

Irish Cream Brownies

The alternate title to this post should be "Cleaning out the liquor cabinet" because these brownies really and truly live up to their name. These are not "Hint of Irish Cream" or "Touch of Irish Cream" or "There was a bottle of Irish Cream in the kitchen when I was making these and therefore might possibly have absorbed some by osmosis". These are most definitely "Hey, I'z gots Irish Cream and might get you drunk. Let's hang out!" brownies.

Baileys Brownies

A year or two ago I hosted an all-out Halloween party at which one of the things I did was re-label all the bottles in my liquor cabinet with creepy cool labels and it has stayed that way ever since. Mostly because I get a kick out of pulling out a bottle labeled "Contaminated Blood" when I make margaritas, or "Vampire's Kiss" when I make martinis. It has been a while since the party though and slowly my cabinet has regained it's upstanding (boring) constitution, however in the very back there was a giant handle of Irish Cream still labeled "Ye Olde Spider Venom" and I'd decided that it was time for it to go.

Baileys Brownies Cut

I have a favorite brownie recipe that I've been making off and on ever since I'd discovered it, and in addition to churning out incredibly dense, moist, flavorful brownies, it easily absorbs a large quantity of liquid of your choosing, making it perfectly adaptable. Originally I had made it with a concentrated glug of Guinness, and really the only difference this time around was that I replaced the 1.25 cups of beer with 1.25 cups of Irish Cream. That's right, I said 1.25 cups of Irish Cream for a single batch! And they came out amazing! So click on the link above (or here) if you have some extra booze lying around and you want to give these a try. They travel great and are perfect for sharing.Oh yeah, and if you eat the whole batch they might get you drunk :D

Friday, September 28, 2012

Plum Jam Bars

The last few weeks have been a whirlwind in the kitchen. I've been re-organizing everything and putting away the things I don't use very often, but as soon as I got one box into storage I got an order that sent me right back into the basement to pull everything back out again. I've had a wedding cake, a grooms cake, three birthday cakes (one almost as big as the birthday kid herself), and 201 jars of blackberry wine jam! I'll definitely tell you all about all of this as soon as I catch my breath and sort through the hastily taken pictures, but today I want to share with you a super simple, everyday recipe in case your life is just as hectic as mine and you're craving a bit of sweetness.

Jam Bars

Plum Jam Bars
Adapted very slightly from Munchkin Munchies

2 cups flour
1/2 cup coconut flour
2 cups packed brown sugar
3 cups oatmeal
1 teaspoon salt
1 1/2 cups butter, melted
1 1/2 cups plum jam (or any jam you like)
1 teaspoon almond extract

1. Preheat oven to 325F degrees. Line with parchment and lightly grease a 9-inch square pan.

2. Combine all ingredients except jam and almond extract. Pat half of the mixture into prepared pan. Mix jam and almond extract. Spread over oat mixture. Pat other half of oat mixture on top.

3. Bake 40-45 minutes or until light golden brown. Cool completely and cut into bars. Don't forget to share!

Crumbs

Saturday, September 8, 2012

Pink Lemon Cupcakes

Today's post comes to you compliments of the fact that I can't actually raise my arms higher than the keyboard. Last week has been a whirlwind of activity including work, showing an out-of-town guest around the city, more work, running after my amazing sister as she did the Chicago Triathlon (to take pictures, of course, no way am I doing THAT anytime soon), and helping move a friend's parents halfway across town. It is not an understatement when I say that everything hurts. For example, did you know that the muscles in your fingers could be sore? I surely didn't. Somewhere in that insanity I had also found time to make two dozen lemon cupcakes for a bridal shower for a friend at work.

Pink Lemon Cupcakes 2

I hadn't actually had time to go grocery shopping in weeks, so the fact that these cupcakes came out with all my substitutions and tweaks is actually a bit of a miracle, but they came out great, tender and just the right combination of tart and sweet, and were devoured by my coworkers in just a few minutes.

Pink Lemon Cupcakes

Lemon Cupcakes with Lemon Cream Cheese Frosting
Recipe adapted from My Baking Addiction
Cupcakes:
2 1/4 cups flour
1 Tbsp baking powder
1/2 tsp salt
1 cup milk (I used 1%)
lemon zest from two lemons
1/4 cup lemon juice, from the two lemons you zested
4 large egg whites
1 1/2 cups sugar
8 Tbsps (1 stick) unsalted butter, at room temp
1 tsp vanilla extract
1/2 teaspoon lemon extract (or lemon oil if you have it)

Frosting:
2 - 8oz packages cream cheese, at room temp
8 Tbsps (1 stick) unsalted butter, at room temp
1 lb confectioners’ sugar (or to taste)
2 tsps vanilla extract
juice of one lemon

Cupcakes:
1. Center a rack in the oven to 350F. Prepare two cupcake tins by using liners or spray with non-stick cooking spray.
2. Whisk together the flour, baking powder and salt in a medium bowl.
3. Whisk together the milk, lemon juice and egg whites in a separate bowl.
4. Put the sugar and lemon zest in a mixer or another large bowl and thoroughly mash it up with a whisk until the sugar is moist and fragrant. Use the same whisk from steps 2 and 3. No need to dirty more stuff. Add the butter and, working with the paddle attachment, or with a hand mixer, beat at medium speed for a full 3 minutes, until the butter and sugar are very light. It will clump up at first, but will soften and gain volume the more you beat it.
5. Add in the extracts and one third of the flour mixture and beat on medium speed just until combined. Beat in half of the wet mixture, then another third of the dry, the rest of the wet, and finally the remaining dry ingredients until incorporated. I like to stop the machine for each addition and stir the mixture in by hand for a few seconds first to avoid wearing half of it when I turn the machine back on.
6. Finally, give the batter a 30 second beating to ensure that there are no lumps left and scoop/pipe the batter into the cupcake tins, filling each well 2/3 full.
7. Bake for about 18 minutes, or until a toothpick inserted into the cupcakes comes out clean. Cool on wire rack.

Frosting:
1. Using a mixer, blend the butter and cream cheese together until light and fluffy.
2. Gradually add in the confectioners' sugar until fully incorporated.
3. Mix in vanilla, lemon juice and any food coloring, if using, and beat until smooth.
4. Taste the frosting and add more confectioners' sugar if you like your frosting thicker or sweeter.
5. Spread or pipe onto cooled cupcakes, and enjoy!

Note: They keep well in the fridge in a tightly sealed container and taste even better on the second day.

Friday, August 31, 2012

Browned Butter Blueberry Tarts

A few months ago I finally got around to reading a book that's been on my bookshelf for, well for a ridiculously long amount of time considering it was a non-fiction book about baking. I had picked it up for $1 at a used book store and it had a giant sticker over the author's name, so I didn't pay too much attention to it. The book was Confections of a Closet Master Baker (and I guess it has now been re-published under a new title for some reason: My Life from Scratch, but from I can tell only the cover image and title changed). Anyways, the author's name is Gesine Bullock-Prado, which still didn't ring any bells until a good long way into the book at which time a lightbulb went on over my head: that's Sandra Bullock's sister! Huh. That's kind of cool. What was even more awesome about the book was the easygoing writing style, the not-sugar-coated stories (despite the high volume of actual sugar involved), and surprisingly the wonderful recipes included in the book. I have quite a few of them bookmarked for future experimentation, but as is my nature I had piled that book back onto the great big pile of things I still need to do and promptly forgot about it again for way too long.

Browned Butter Blueberry Tarts Unbaked

A little while ago I had decided to clean out my freezer and among all the other odds and ends I had found some leftover tart dough from a quiche I had made for Mother's day. Apparently it keeps extremely well if wrapped up tightly and stored in the back of the freezer. I had a pint of blueberries sitting in the fridge (there were two but I hoovered up the first one like popcorn) and all I needed was a recipe to put the two together. I did a quick search and found Dessert First Girl's blog, with a....book review for Gesine Bullock-Prado's cookbook: Pie It Forward! Her post was about the blueberry brown butter tarts from the book and they looked and sounded like just what I was looking for, so I used my crust scraps, whipped up her tart filling and made mini tartlets that I grabbed straight from the oven, tossed into a box and brought with me to an impromptu family brunch. I believe one comment was "This is the best thing I've ever put into my mouth!" I'll chalk that up as a success and Gesine's book is now back at the top of my todo pile.

Browned Butter Blueberry Tarts Baked

Browned Butter Blueberry Tarts
Recipe adapted from Gesine Bullock-Prado via Dessert First Girl  
For the crust I used the leftovers from here, but you are also welcome to make the crust from Dessert Girl's post.

Filling:
2 large eggs
1/2 cup (100 g) sugar
1/2 tsp vanilla bean paste
1/2 tsp salt
1/4 cup (30 g) flour
1/2 cup (115 g) unsalted butter
1 pint (340 g) blueberries

Crust:
- If you're using up dough leftovers like I was, let the dough defrost in the fridge overnight. Flour the counter and roll out the dough to about 1/4" thickness. Cut out circles of dough to fit into mini tart pans, press it in and dock the bottom with a fork. Let the prepared pans rest in the fridge or freezer for 15-20 minutes while you preheat the oven to 350F. (Otherwise just use your own crust and pre-bake it like I did).
- Fill your tart pans with parchment paper (I like to crumple it up so that it fits into the pans better) and pie weights/beans/rice and pre-bake for 15 minutes or just until the bottoms no longer look wet. In the mean time, make your filling.

Filling:
- Combine eggs, sugar, vanilla, and salt in a medium bowl and whisk together.
- Sift flour over the mixture and carefully fold in.
- Place butter in a medium saucepan and melt over medium-high heat until melted. Continue cooking until butter has lightly browned and begins to smell nutty. Keep a careful eye on it because once it starts browning it can burn really quickly and become unusable. Remove from heat and let cool slightly.
- Pour browned butter into egg mixture and whisk to combine.
- Divide blueberries among the tart tins. Pour the butter mixture over the berries until they are just covered.
- Bake tarts for 20-25 to minutes, until the top crust is browned and filling is bubbly.
- Let it cool completely before removing from the tart tins or you'll end up burning your hands. Ask me how I know that.

Monday, August 6, 2012

Mojitos on a Whim

Mojito Process

This morning one of my lovely co-workers brought me a bouquet, which basically made my Monday. Not just any bouquet, mind you, she brought me a bouquet of mint she'd picked from her garden that morning. Now I don't know what this means for you, but for me that means the day will end with a mojito!

Mojito Fixins

All day long the mint sat on my desk smelling heavenly and completely erasing any work related stress and when I got home I had a quick dinner, whipped up a mini batch of mint simple syrup, ran around and did some small chores around the house while it cooled, and before I lost all light I mixed up a nice tall frosty mojito for myself, heavy on the lime. I highly recommend it!

Mojito

Simple Mojito
makes 2 (or one huge one if you're a lush).
I know this isn't rocket science and quite a few people will either not want a recipe or have an even better one, but this made me so happy today that I just wanted to share with you my way.

3 limes
rum (I used Bacardi)
1 cup sugar
1 cup water
Big bunch of fresh mint
club soda or tonic
ice

1. In a small saucepan combine sugar water and a good handful of torn mint leaves. This isn't really an exact science, you just want all the leaves to be submerged so don't put in too much. Bring to a simmer and stir until all the sugar is dissolved, then turn off the heat and let it infuse and cool for at least 15 minutes.
2. Roll your limes across the counter a few times pressing hard to break down the insides and juice them.
3. Drop a few mint leaves into the bottom of your two glasses and bash them with a muddler, fork, rolling pin, or any other blunt object you may have on hand. Beat the crap out of them, just don't break the glasses.
4. Fill the glasses about half full of ice, top with two shots of rum, one or two shots of your mint syrup (depending on how sweet you like it), a shot of lime juice and a splash of club soda or tonic. Stir.
5. Stick a sprig of mint in there to make it pretty, find a straw and a chair in the shade and enjoy.

* Save any leftover simple syrup for next time...or for round two :D
Mint Simple Syrup

Tuesday, July 31, 2012

Meyer Lemon Lavender Marmalade

Last year, right around now, I already had several dozen jars full of different kinds of jams, syrups, sauces, and what-have-you. This year it's been way too hot and so instead of canning the gorgeous fruit, I'd been eating it straight from the fridge. Every thought to turn on the stove or the oven is cross referenced against the time it would take for my house temperature to recover, and 9 times out of 10 I decide to make a salad or assemble something random out of whatever is in the fridge.

Meyer Lemons

All was going just fine until I ran into Meyer Lemons. Around here, these babies are hard to find and when you do see them, they're pricey, so when I found a whole bunch of them on sale I had to get them.

Meyer Lemons 2

I'd had this jam tagged to make at some point in the distant future for just such a windfall as this and so despite the insane temperatures I pulled up the recipe and made marmalade.

Meyer Lemon and Lavender Marmalade


I had picked up a small bag of lavender during a short trip to New York last year and I'd been hoarding it for something special, so I knew I had everything on hand. On the second day the piping jam was safely canned, the loud pings as the lids sealed quieted down, and I was left with a little extra to spread on toast. It's thick, a bit chunky, not too sweet, only a little bit bitter, delicately floral and utterly delicious! Definitely worth the wait.

Meyer Lemon and Lavender Marmalade 2

Meyer Lemon Lavender Marmalade
Recipe adapted from Local Kitchen. Also, keep in mind that this will take at least 2 days.

2 lb lemons, I used Meyer, but regular will work just fine
1/4 cup + 2 tsp dried culinary lavender, divided
5 cups sugar
1 tsp Kosher salt
1 Tbsp vanilla

On the first day:
1. Scrub lemons really well and slice into 8 wedges lengthwise (she recommended a serrated knife and it worked like a charm). Remove seeds and reserve in a small bowl. Thinly slice sections, cross-wise, and transfer to a large measuring cup, trying to save as much juice as possible. This will take you a long time and make your fingers very pruny; be sure you have no cuts on your fingers because it will sting. Measure amount of lemons and juice (I had about 5 cups).
2. Measure out an equal amount of filtered water into a medium saucepan. Add lemon seeds and 1/4 cup lavender; bring to a boil, reduce heat to low and simmer, covered, for 10 minutes. Turn off the heat and steep for at least 30 minutes and up to several hours.
3. Strain lavender water into a measuring cup, squeezing the lavender buds to get out all the liquid, then discard seeds and lavender. Add additional filtered water to bring volume back up to original amount if necessary. Return lavender water to the saucepan, add lemons + juice and bring to a boil. Reduce heat and simmer, uncovered, for 15 minutes, skimming foam if necessary. Turn off heat, allow to come to room temperature, then cover and allow to sit at room temperature overnight.

On the second day:
1. Prepare your canner, jars and lids so that everything is ready to go.
2. Measure lemon mixture and transfer to a large saucepan or small stockpot. Add salt. Measure out sugar to your taste (I don't like my jam too sweet, and all the citrus means that I can safely cut the sugar a bit, so I only added 5 cups, but you're welcome to add more if you like your marmalade sweeter. Most recipes suggest a 1:1 ratio between lemon mixture and sugar). Add sugar in 1/2 cup increments, allowing the marmalade to come to a boil in between additions. Once all the sugar is in, add in the vanilla and boil, stirring frequently until the marmalade reaches the gel point, which should only be a few more minutes. The suggested temp was 220F at sea level, which is where I am, but I stopped it at 210F and still got a very firm set. Be sure to taste a cooled sample of marmalade during cooking to adjust sugar, if desired.
3. Transfer to a large, heat-safe bowl and allow marmalade to sit, cooling, for a minute or two; it should start gelling quite quickly. Stir down the pieces of fruit, and stir in the remaining 2 tsp of dried lavender. Fill hot, sterilized jars to 1/4-inch headspace, wipe rims, affix lids, and process in a boiling water bath for 10 minutes.

Note: I had doubled the original recipe and ended up with four 8oz jars and enough to fill one 4oz jar.

Monday, July 16, 2012

Kitchen Sink Oatmeal and Spar for the Spurtle Recipe Contest

I am by no means an oatmeal making expert, but if I was, not to mention if I wasn't camera shy, you can bet your oats I'd be entering Bob's Red Mill's Spar for the Spurtle Oatmeal Recipe Contest. I know there isn't that much time left, but hurry up and get your grains in order and enter enter enter! You know what's on the line? Three finalists will win a trip to Portland, Oregon where they'll compete for the ULTIMATE PRIZE: A trip for two to Scotland to represent Bob's Red Mill at the 19th annual Golden Spurtle World Porridge Making Championship in October, plus expenses/accommodations/etc. Look at the web site for details, but right after you do that, run to the store, pick up a bag of Bob's Red Mill Steel Cut Oats, whip up a batch of your awesome oatmeal and video tape yourself doing your thing.


To help motivate you, to set the fire under your bum, to get your creative juices boiling (and for me to apologize for telling you about this so late), the awesome folks at Bob's Red Mill have offered an extra incentive for those go getters who enter the contest before the deadline (July 20th). All you have to do is create your video, enter it at the contest website and come back here to my blog and let me know that you entered. The first 5 of you will receive a box stuffed with goodies (don't forget to leave contact info). How cool is that? I'm told the box will be chock full of:

* Honey Oat Granola
* Cinnamon Raisin Granola
* Scottish Oats
* 7 Grain Pancake Mix
* A spurtle of your very own!!!

So GO GO GO!!!!

Oh, and in the spirit of things, to get you started, to get you thinking, I'll share with you my oatmeal recipe.

Oatmeal Prep

When I bake, I am precise, I plan ahead, I measure everything, I alter recipes in very logical ways and take great big risks only when I'm 90% sure of success (that's still a risk you know). On the other hand, cooking usually involves the proverbial "kitchen sink" and this oatmeal recipe is no exception.

Quartered Pears

When I found out about the contest, I opened the pantry knowing that I had Bob's Steel Cut Oats in there, but what else should go in there? I don't like my oatmeal plain, so I started pulling things off of shelves to see what will go well. I like to add apple sauce to my oatmeal, but I didn't have any on hand. I did have one lonely pear left, so that got peeled, pureed and tossed in. I had a packet of Justin's Maple Almond Butter, so that went in too for sweetness and a bit of extra protein. A touch of honey, a jar of Coconut Milk (jars of this stuff multiply in my pantry like rabbits), a dash of vanilla and I was ready to go.

Almond Butter

Also, while I'm not actually entering the contest myself (I don't look all that glamorous when I cook and no one will ever catch THAT particular process on tape), I did create this fun little gif of the oatmeal bubbling away.


The thick bubbles made it look a bit like the oatmeal was screaming at me, so to capture that, I made another little gif. Okay, so I just like making these. Whatever. They're fun.


I scooped some into a cup, added some shredded coconut and took a picture. What I saw through my viewfinder was a lovely cup of what looked like parsnip soup with Parmesan cheese. Damn, that won't work. I can tell you all I want about how yummy this came out and you'll never make it because it looks like this:

Cup of Oatmeal

So to make the picture better I added a few chocolate chips. You know what this ended up tasting like? An Almond Joy. Um, talk about an upgrade! I may have just invented dessert oatmeal. Try it, it's really good!

Cup of Oatmeal 2

Kitchen Sink Oatmeal
Aside from the cooking instructions on the package, this recipe is entirely my own as no one should be blamed for the sheer random contents of my pantry that culminated in this awesomeness.

1 cup Steel Cut Oats (I used Bob's Red Mill)
1 13.5oz can of coconut milk (fat free or full fat, both will be lovely)
Enough cold water added to the coconut milk to make 3 3/4 cups
1 Tbsp vanilla
1/2 tsp salt
1 or 2 pureed pears (or apples or bananas or whatever you have)
3 Tbsp almond butter (or peanut butter or Nutella or whatever you want)
3 Tbsp honey
shredded unsweetened coconut
a handful of dark chocolate chips

1. Combine the oats, milk, water, vanilla and salt in a large pot over medium heat and bring the mixture to a boil. You want the pot to be big enough to allow the mixture to rise as it simmers. I didn't and I had to keep a very close eye on my pot to avoid a spill.
2. Lower the heat to a low simmer, cover the pot and cook for 20-30 minutes, depending on how soft/mushy you like your oatmeal. Stir often!!!
3. Once the oatmeal is cooked to your liking, remove the pot off heat and mix in your pears, almond butter and honey (or whatever you decided to substitute these with).
4. Let it cool a bit and thicken, scoop into a cup or a bowl and top with shredded coconut and chocolate chips. Enjoy!